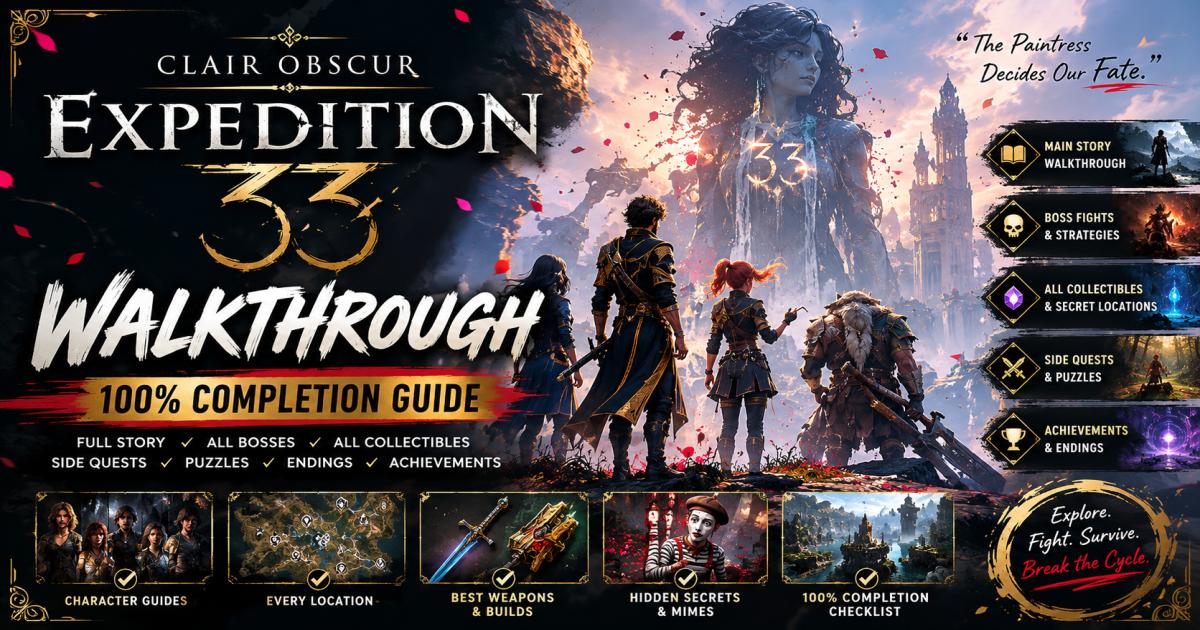
Clair Obscur Expedition 33 Walkthrough: 100% Completion Guide
Stopping the Paintress takes more than just quick reflexes. This complete Clair Obscur Expedition 33 walkthrough serves as your definitive roadmap to uncovering every secret, mastering turn-based real-time combat, and unlocking the true ending. Sandfall Interactive’s RPG forces you to manage time, resources, and tactical positioning. If you want to find every hidden item, beat the hardest post-game trials, and complete your collection, this step-by-step guide covers it all.
Our core strategy for clearing hard encounters relies on the 10-AP Overcharge trick, an expert tactic where you pool maximum Action Points on Gustave to instantly shred boss defense meters during a staggered state. Let’s break down how to conquer this beautiful, dying world.
Clair Obscur Expedition 33 at a Glance
Story Overview (Spoiler-Free)
Once a year, the Paintress wakes up. She paints a single number on a massive stone monolith. Anyone of that exact age turns into smoke and disappears forever. Tomorrow, she will be painting the number 33.. You control Gustave and a desperate group of expeditionaries who are setting out on a final journey into the Continent. Your objective is simple: track down the Paintress and destroy her before she can wipe out the remaining youth of humanity.
Total Chapters and Acts
The main campaign divides cleanly into three overarching acts, containing 15 distinct structural areas:
- Prologue: The city of Lumière.
- Act I: Covers the initial trek through Spring Meadows, Flying Waters, and the Stone Wave Cliffs.
- Act II: Delves into the darker interior regions, including the Forgotten Battlefield and the base of the Monolith.
- Act III: The high-stakes final push through the Crimson Forest and the return to the origin point.
Average Completion Time
A standard playthrough focused mainly on the primary story takes roughly 38 hours. If you intend to find every collectible, finish all NPC stories, and beat the post-game bosses, your total playtime will typically sit between 75 and 85 hours.
Difficulty Levels Explained
- Story Mode: Widens the reaction windows for defensive prompts and lowers enemy health pools.
- Standard Mode: The baseline experience. Requires deliberate character builds and steady execution.
- Expedition Mode: Aggressive enemy AI, heavy incoming damage, and tight windows for parrying. Missing a single reaction can result in an immediate party wipe.
Is Anything Missable?
Yes. The early chapters feature hidden Mime encounters that vanish if you advance the story too far. Certain dialogue choices during the initial Lumière festival also lock out specific achievements. Keep separate manual saves at the start of each new act.
Before You Begin Your Journey
Beginner Tips You Should Know
Never hoard your Lumina points. Spend them as soon as you rest at a checkpoint to unlock essential stat increases. Search every dead-end pathway; chests tucked away in corners contain vital upgrade materials like Tints and Chroma Catalysts that you cannot buy from early-game vendors.
Best Difficulty for First Playthrough
We suggest starting on Standard Mode. This setting offers a fair tactical challenge without forcing perfect frame execution during early areas, giving you ample time to learn how status effects interact.
Understanding Combat Basics
Combat combines traditional turn-based selections with active inputs. While you pick commands from a standard menu, you must hit precisely timed button prompts during an attack to maximize your damage or apply status adjustments.
Parry, Dodge, Break & Counter Mechanics
When an enemy swings at your party, a defensive prompt appears. Tapping the button perfectly triggers a Dodge or a Parry. Successful parries reduce incoming damage to zero and fill the enemy’s yellow Break bar.
Once that bar tops out, the target enters a broken state. This is where you deploy the 10-AP Overcharge trick: passing turn actions to Gustave so he can discharge a maximum-power physical assault while the enemy takes amplified damage.
Attribute and Stat Priorities
Prioritize Speed and Critical Hit Rate for Maelle to maximize her multi-strike abilities. For Gustave, focus heavily on physical attack power and Break influence. Sciel requires high base Lumina regeneration to keep your party supplied with defensive barriers and healing spells.
How Save Points Work
You can save your game progress exclusively at Expedition Flags. Resting at these flags fully restores your party’s health and skill meters, but it also resets all standard enemies across the local zone.
The Master Clair Obscur Expedition 33 Walkthrough
Prologue Walkthrough
Your journey begins across the stone slate rooftops of Lumière. Follow Maelle’s movement path using your grappling hook. Keep an eye out for a glowing blue chest on a scaffold to your left; it holds your first raw Chroma shard. Complete Antoine’s history test in the public square (correct answers: 67 years ago, Expedition Zero, Abilities you internalize) to obtain a Festival Token. Engage in the tutorial duel against Maelle to complete the opening segment.
Act I Walkthrough
Gustave takes command as the party enters the open fields of Spring Meadows. Learn how to track environmental paths by following the white flags. When you reach the Flying Waters zone, look for glowing blue cables running along the rock walls. These lines lead directly to the structural locks sealing the area’s first Paint Cage. Shoot these locks from a distance using Sciel’s firearm. Complete the act by navigating through the Ancient Sanctuary and climbing the vertical paths of the Stone Wave Cliffs.
Act II Walkthrough
The tone shifts dramatically as Verso joins the active party inside the Forgotten Battlefield. Watch for enemy ambushes when navigating the trenches near Monoco’s Station. You must clear out the regional Nevron patrols before the gate opens. Move through the Visages ruins and complete the riddle of the four stone masks to open the path leading down toward the foundation of the Monolith.
Act III Walkthrough
Maelle takes the lead for the final push through the Crimson Forest. This zone features high-level enemies that regularly inflict heavy burn and poison status effects. Ensure your active party carries accessories that grant elemental resistance. Push forward through the Frozen Hearts cavern system to trigger the transition back to the ruins of Lumière for the final encounter.
Complete Boss Walkthrough
Every Main Boss
- Évêque (Spring Meadows): This boss relies on a three-hit physical rotation. Parry the first two standard horizontal swings, then execute a side dodge to avoid the final unblockable overhead slam.
- Goblu (Flying Waters): He continually summons smaller aquatic minions to absorb your attacks. Use Maelle’s sweeping abilities to clear out the minor enemies, then focus your single-target skills on the main boss.
- Renoir (Old Lumière): Renoir generates a persistent physical shield. You must use Lune’s magical elements to gradually melt his protection before your physical attacks can deal direct damage.
- The Paintress (Lumière): The final battle features multiple distinct phases. She shifts her elemental weaknesses every three turns. You must rotate your party members out actively to match her current vulnerability.
Optional Bosses
- The Lampmaster: Located deep within the optional Smoldering Hollow dungeon. He uses heavy fire damage that can quickly wipe your party. Equip your team with Flame Tincture items before initiating the fight.
- Ultimate Sakapatate: A hidden joke boss with massive defensive stats. Use high-break abilities to crack its shell before trying to deal actual damage.
Secret Bosses
The Mimes represent the ultimate hidden challenge. They are scattered across secret alcoves in five major zones. These enemies do not attack you directly; instead, they mirror the exact commands you select. To defeat them easily, cast defensive barriers on your team and allow negative status effects or poison traits to slowly drain their health pool over time.
Post-Game Bosses
Beating the main story unlocks access to the Endless Tower. Here, you will face high-level versions of every primary story boss, concluding with a final battle against an entity known as The Creator. You will need fully optimized level 99 character builds to survive this gauntlet.
All Chapters Walkthrough Summary
| Chapter Location | Recommended Level | Main Boss Encounter | Core Collectible Count | Missable Target |
| Prologue: Lumière | Levels 1-5 | Maelle (Tutorial Spar) | 3 Festival Tokens | Jules’ Custom Uniform |
| Act I: Meadows & Cliffs | Levels 5-25 | Évêque / Goblu | 12 Hidden Paint Cages | First Secret Mime |
| Act II: Battlefield & Base | Levels 25-45 | Renoir / Visages | 8 Lost Gestral Keepsakes | Mask Riddle Choice |
| Act III: Crimson Forest | Levels 45-60+ | The Paintress | 5 Ultimate Weapon Frames | None |
Every Collectible Location (100%)
To hit total completion, you must track down every hidden Paint Cage and Lost Gestral memento across the Continent.
- Spring Meadows: Look behind the secondary waterfall near the third flag to locate a hidden chest containing a rare weapon skin.
- Flying Waters: Three distinct paint cages are situated on isolated floating rocks. Use Esquie’s sonar ability to highlight the exact positions of the glowing locks needed to open them.
- Forgotten Battlefield: Search inside the collapsed canvas tents along the northern edge of the trenches to find the hidden Lost Gestral dog tags.
Complete Side Quest Walkthrough
Early Side Quests
Speak with Richard near the Lumière market square during the prologue. He tasks you with tracking down his missing son, Jules. Find Jules hiding underneath the main canal bridge to earn the Crimson Uniform cosmetic set.
Mid-Game Side Quests
At Monoco’s Station, talk to the eccentric collector NPC. He requests five intact Nevron Cores. Hunt the large brute enemies in the immediate area to collect these items and unlock a permanent item discount at his shop.
Late Game Side Quests
Locate the injured traveler in the Crimson Forest. Escort him safely to the nearest Expedition Flag while defending against three waves of aggressive plant-based enemies to earn a top-tier stat accessory.
Hidden NPC Quests
If you speak to Nicolas the painter in the prologue, you can find him again during Act III in the ruins. Presenting him with the completed sketch notebook unlocks a unique support Picto for Sciel.
Optional Dungeons
The Gestral Shallows and the Abandonded Manor are entirely optional areas. They do not feature any main story milestones, but clearing them is mandatory to secure the best endgame equipment and hit 100% completion.
Every Puzzle Solution
Environmental Puzzles
The Paint Cages across Act I require clear line-of-sight solutions.
1. Locate the Cage:
Find the main caged container and follow the glowing blue energy strands outward into the surrounding area.
2. Trace the Lines:
Use your grappling hook to reach high vantage points where the power lines terminate at mechanical gear locks.
3. Destroy the Locks:
Switch to Sciel and use her precise ranged shot mode to destroy all three locks within the time limit to open the chest.
Statue Puzzles
Inside the Ancient Sanctuary, you will encounter four massive stone statues surrounding a central altar. Examine the painted mural on the ceiling of the room. Rotate each individual statue until its weapon points in the exact direction indicated by the ceiling painting to open the floor vault.
Platforming Challenges
Act II introduces complex grapple points that move back and forth along set paths. Time your grapple inputs right as the hooks reach the apex of their swing. If you miss your timing and fall, your active character loses a small percentage of health, and you reset at the last safe platform.
Hidden Mechanisms
The stone mask gate puzzle within the Visages zone requires you to interact with four distinct facial carvings in a specific sequence. Examine the inscription on the central tablet, then activate the masks in this exact order: Joy, Sorrow, Anger, and Apathy.
Character Guides
Gustave Guide
Gustave acts as your primary front-line fighter and protective tank. His abilities focus on dealing high physical damage and building up the enemy’s Break bar. Invest your early skill points into his heavy sword techniques.
Lune Guide
Lune serves as your primary elemental mage. She focuses on casting wide area-of-effect spells that apply status effects like freeze and burn. Use her to strip away enemy defensive shields quickly.
Maelle Guide
Maelle functions as a high-speed, high-critical-damage dealer. Her defensive reaction windows are narrower than other party members, but her ability to strike multiple times in a single turn makes her your best asset for melting boss health pools.
Sciel Guide
Sciel balances ranged attacks with powerful party support. She can apply defensive barriers to allies and heal multiple party members simultaneously. Always keep her in your active squad during major boss encounters.
Verso Guide
Verso utilizes a unique counter-focused combat style. His mechanics reward you for executing perfect parries, allowing him to launch immediate, high-damage follow-up strikes without expending Action Points.
Monoco Guide
Monoco is a versatile character who can copy specific skills from defeated Nevron monsters. This blueprint system allows you to customize his active ability list to fill gaps in your current party setup.
Best Character Builds
Best Early Game Build
Focus entirely on raw physical power and survivability. Equip Gustave with health-boosting accessories and rely on Maelle’s basic multi-strike skills to clear out early encounters without consuming too much AP.
Best Mid Game Build
Shift your focus toward status synergy. Optimize Lune for the fastest possible elemental application speed. Use her spells to freeze targets, then have Gustave follow up with a heavy physical strike to trigger a shatter reaction for double damage.
Best Endgame Build
To effectively tackle the toughest challenges, optimize your party by utilizing the 10-AP Overcharge strategy. Maximize Sciel’s Action Point generation stats using specialized endgame gear. Transfer all generated AP directly to Gustave during combat, allowing him to repeatedly chain his strongest Overcharge attacks back-to-back while the enemy stays broken.
Best Skills
- Gustave: Rending Cleave (High base break value)
- Maelle: Blink Assault (Excellent critical strike scaling)
- Sciel: Sanctuary Barrier (Deploys a party-wide shield)
Best Weapons
Look for weapons that offer high risk-and-reward trade-offs rather than balanced stats.Swords that reduce your base defense by 10% while increasing your critical strike damage by 30% provide the best scaling for late-game areas.
Best Pictos
Prioritize unlocking the Vampiric Picto (restores health to the user based on a percentage of damage dealt) and the Stasis Picto (extends the duration an enemy stays in a broken state).
Best Lumina Setup
Set up two distinct preset slates for your main team. Dedicate one profile entirely to maximum offensive stats for standard exploration, and configure the second layout for high elemental defense and health bonuses to swap into during boss fights.
Every Weapon Location
Sword Locations
Gustave’s strongest weapon, the Ruined Monolith Edge, sits inside a hidden chest behind a fake stone wall in the lower levels of the Visages zone.
Catalyst Locations
Sciel’s ultimate weapon frame, the Chroma Core Catalyst, requires you to complete the optional Flying Manor dungeon and open the chest located on the roof observatory.
Upgrade Materials
You can farm standard upgrade materials like Tints by defeating the large elite Nevron centurions that patrol the outer paths of the Forgotten Battlefield.
Weapon Upgrade Guide
Bring your gathered materials to the blacksmith NPC located in the Old Lumière survivor camp. Always focus on upgrading your main damage dealer’s weapon to maximum rank before spending resources on your support characters’ gear.
All Trophy & Achievement Walkthrough
Story Achievements
You will unlock approximately 40% of the game’s total achievement list simply by playing through the main acts and finishing the core story campaign.
Hidden Achievements
- The Quiet Valley: Awarded for finding and defeating every hidden Mime encounter across the Continent.
- Lumière’s Tailor: Earned by collecting every character costume variant hidden in the optional dungeons.
Missable Achievements
The Festival Champion achievement requires you to collect all three hidden tokens in the prologue city area. If you board the expedition boat without finding them, you must start a completely new game file to claim it.
Platinum Trophy Roadmap
Start your run on Standard Mode. Carefully explore the prologue to secure all missable tokens and the initial side quest. Progress through the main acts while checking every corner for Paint Cages. Complete all character side stories before entering the final Monolith elevator, then clear the post-game Endless Tower to secure the final trophies.
Every Ending Explained
Normal Ending
Triggers if you head straight to the final confrontation without finishing the Lost Gestral questlines. Your party defeats the Paintress and halts the current countdown, but the Continent remains broken, and humanity’s long-term future stays uncertain.
True Ending
Unlocked by finding every single Lost Gestral keepsake and maximum bonding with your active party members. This path triggers an extended final cutscene showing the expedition using residual Chroma energy to permanently heal the fractured land, allowing the city to rebuild.
Secret Ending
Accessible exclusively on New Game+ while playing on Expedition difficulty. Defeating the final boss under these strict conditions reveals a short scene showing that the Paintress was merely a servant to a much larger threat lurking beyond the stars.
New Game+ Guide
What Carries Over
- Your current character levels and total accumulated experience.
- All unlocked Pictos, Lumina upgrades, and maximum weapon levels.
- Your entire collection of cosmetic outfits and color options.
What Resets
- All story-specific key items and puzzle quest items.
- Your overall map exploration progress and unlocked fast-travel flags.
- Active side quest progression loops.
Best Things to Do Before NG+
Before starting a New Game+ run, make sure to maximize your primary weapons using your remaining materials. Collect all chests in the Endless Tower, as the upgrade resources found there are scarce during the early chapters of a fresh run.
100% Completion Checklist
Story Progress
- [ ] Complete the Prologue, Act I, Act II, and Act III campaigns.
- [ ] Trigger and view the True Ending sequence.
Bosses Defeated
- [ ] Conquer all 15 core storyline bosses.
- [ ] Locate and defeat the Lampmaster and Ultimate Sakapatate.
- [ ] Complete all 50 floors of the post-game Endless Tower.
Collectibles Found
- [ ] Locate and unlock every hidden Paint Cage on the Continent.
- [ ] Collect all 8 Lost Gestral keepsakes.
Side Quests Completed
- [ ] Return Jules’ Custom Uniform to Richard in the prologue.
- [ ] Deliver the finished sketch notebook to Nicolas the painter.
Optional Areas Cleared
- [ ] Complete all combat trials within the Gestral Shallows.
- [ ] Solve the puzzles inside the Abandoned Manor.
Final Thoughts
Succeeding in Clair Obscur: Expedition 33 requires balancing aggressive turn-based actions with precise real-time defensive inputs. By following this complete walkthrough, optimizing your party around high-break synergies, and tracking down every hidden collectible, you will easily conquer the Continent and save humanity from the Paintress’s countdown. Keep your parry timing steady and make every turn count.
Frequently Asked Questions
How long does it take to beat Clair Obscur Expedition 33?
A direct run focusing solely on the main path takes around 38 hours. A thorough 100% completion run typically requires 80 hours of total playtime.
Can you get 100% completion in one playthrough?
Yes. However, you must carefully collect all three tokens during the prologue festival and defeat every hidden Mime before advancing past the major act transitions.
Are there missable collectibles?
Yes. The collectibles and specific character side quests located within the initial Lumière city area become permanently locked once you depart on the expedition ship.
What’s the best starting difficulty?
Standard difficulty offers the most balanced experience for a first run. It forces you to learn the defensive parry mechanics without being overly punishing.
What’s the maximum level?
Your characters can reach a maximum level of 99. Most players will typically cross the finish line of the main story around level 60.
Which boss is the hardest?
Renoir presents the sharpest difficulty increase during the main story due to his changing physical shield values. In the post-game, The Creator on the final floor of the Endless Tower is the toughest fight.
Is New Game+ worth playing?
Yes. It provides the only way to view the secret ending scene and allows you to test your fully optimized endgame builds against significantly tougher enemy stat pools.